Hướng dẫn điều khiển trình phát từ trên xuống cho Unity
Nhiều người đã quen thuộc với các thể loại game như FPS (Bắn súng góc nhìn thứ nhất) và RTS (Chiến lược thời gian thực), nhưng cũng có nhiều game không chỉ thuộc một thể loại cụ thể. Một trò chơi như vậy là Bắn súng từ trên xuống.
Bắn súng từ trên xuống là trò chơi trong đó người chơi được điều khiển từ góc nhìn từ trên xuống.
Ví dụ về game bắn súng từ trên xuống làHotline Miami,Hotline Miami 2,Original Grand Theft Auto, v.v.
Để tạo Bộ điều khiển ký tự từ trên xuống trong Unity, hãy làm theo các bước bên dưới.
Bước 1: Tạo tập lệnh
Đối với hướng dẫn này, chúng ta sẽ chỉ cần một tập lệnh.
- Tạo một tập lệnh mới, đặt tên là SC_TopDownController, xóa mọi thứ khỏi tập lệnh và dán mã bên dưới vào trong tập lệnh:
SC_TopDownController.cs
using UnityEngine;

[RequireComponent(typeof(Rigidbody))]
[RequireComponent(typeof(CapsuleCollider))]

public class SC_TopDownController : MonoBehaviour
{
    //Player Camera variables
    public enum CameraDirection { x, z }
    public CameraDirection cameraDirection = CameraDirection.x;
    public float cameraHeight = 20f;
    public float cameraDistance = 7f;
    public Camera playerCamera;
    public GameObject targetIndicatorPrefab;
    //Player Controller variables
    public float speed = 5.0f;
    public float gravity = 14.0f;
    public float maxVelocityChange = 10.0f;
    public bool canJump = true;
    public float jumpHeight = 2.0f;
    //Private variables
    bool grounded = false;
    Rigidbody r;
    GameObject targetObject;
    //Mouse cursor Camera offset effect
    Vector2 playerPosOnScreen;
    Vector2 cursorPosition;
    Vector2 offsetVector;
    //Plane that represents imaginary floor that will be used to calculate Aim target position
    Plane surfacePlane = new Plane();

    void Awake()
    {
        r = GetComponent<Rigidbody>();
        r.freezeRotation = true;
        r.useGravity = false;

        //Instantiate aim target prefab
        if (targetIndicatorPrefab)
        {
            targetObject = Instantiate(targetIndicatorPrefab, Vector3.zero, Quaternion.identity) as GameObject;
        }

        //Hide the cursor
        Cursor.visible = false;
    }

    void FixedUpdate()
    {
        //Setup camera offset
        Vector3 cameraOffset = Vector3.zero;
        if (cameraDirection == CameraDirection.x)
        {
            cameraOffset = new Vector3(cameraDistance, cameraHeight, 0);
        }
        else if (cameraDirection == CameraDirection.z)
        {
            cameraOffset = new Vector3(0, cameraHeight, cameraDistance);
        }

        if (grounded)
        {
            Vector3 targetVelocity = Vector3.zero;
            // Calculate how fast we should be moving
            if (cameraDirection == CameraDirection.x)
            {
                targetVelocity = new Vector3(Input.GetAxis("Vertical") * (cameraDistance >= 0 ? -1 : 1), 0, Input.GetAxis("Horizontal") * (cameraDistance >= 0 ? 1 : -1));
            }
            else if (cameraDirection == CameraDirection.z)
            {
                targetVelocity = new Vector3(Input.GetAxis("Horizontal") * (cameraDistance >= 0 ? -1 : 1), 0, Input.GetAxis("Vertical") * (cameraDistance >= 0 ? -1 : 1));
            }
            targetVelocity *= speed;

            // Apply a force that attempts to reach our target velocity
            Vector3 velocity = r.velocity;
            Vector3 velocityChange = (targetVelocity - velocity);
            velocityChange.x = Mathf.Clamp(velocityChange.x, -maxVelocityChange, maxVelocityChange);
            velocityChange.z = Mathf.Clamp(velocityChange.z, -maxVelocityChange, maxVelocityChange);
            velocityChange.y = 0;
            r.AddForce(velocityChange, ForceMode.VelocityChange);

            // Jump
            if (canJump && Input.GetButton("Jump"))
            {
                r.velocity = new Vector3(velocity.x, CalculateJumpVerticalSpeed(), velocity.z);
            }
        }

        // We apply gravity manually for more tuning control
        r.AddForce(new Vector3(0, -gravity * r.mass, 0));

        grounded = false;

        //Mouse cursor offset effect
        playerPosOnScreen = playerCamera.WorldToViewportPoint(transform.position);
        cursorPosition = playerCamera.ScreenToViewportPoint(Input.mousePosition);
        offsetVector = cursorPosition - playerPosOnScreen;

        //Camera follow
        playerCamera.transform.position = Vector3.Lerp(playerCamera.transform.position, transform.position + cameraOffset, Time.deltaTime * 7.4f);
        playerCamera.transform.LookAt(transform.position + new Vector3(-offsetVector.y * 2, 0, offsetVector.x * 2));

        //Aim target position and rotation
        targetObject.transform.position = GetAimTargetPos();
        targetObject.transform.LookAt(new Vector3(transform.position.x, targetObject.transform.position.y, transform.position.z));

        //Player rotation
        transform.LookAt(new Vector3(targetObject.transform.position.x, transform.position.y, targetObject.transform.position.z));
    }

    Vector3 GetAimTargetPos()
    {
        //Update surface plane
        surfacePlane.SetNormalAndPosition(Vector3.up, transform.position);

        //Create a ray from the Mouse click position
        Ray ray = playerCamera.ScreenPointToRay(Input.mousePosition);

        //Initialise the enter variable
        float enter = 0.0f;

        if (surfacePlane.Raycast(ray, out enter))
        {
            //Get the point that is clicked
            Vector3 hitPoint = ray.GetPoint(enter);

            //Move your cube GameObject to the point where you clicked
            return hitPoint;
        }

        //No raycast hit, hide the aim target by moving it far away
        return new Vector3(-5000, -5000, -5000);
    }

    void OnCollisionStay()
    {
        grounded = true;
    }

    float CalculateJumpVerticalSpeed()
    {
        // From the jump height and gravity we deduce the upwards speed
        // for the character to reach at the apex.
        return Mathf.Sqrt(2 * jumpHeight * gravity);
    }
}![]()
Bước 2: Tạo Shader
Hướng dẫn này cũng yêu cầu một trình đổ bóng tùy chỉnh, cần thiết để làm cho mục tiêu Aim phủ lên phần còn lại của các Đối tượng (luôn ở trên cùng).
- Nhấp chuột phải vào chế độ xem Dự án -> Tạo -> Shader -> Standart Surface Shader
- Đặt tên cho trình đổ bóng "Cursor"
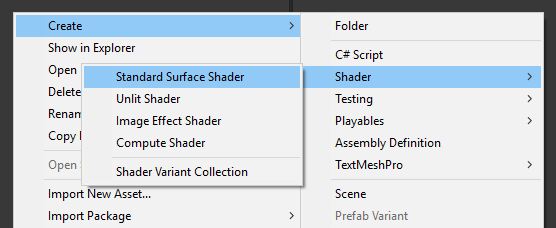
- Mở shader, xóa mọi thứ bên trong rồi dán mã bên dưới:
Con trỏ.shader
Shader "Custom/FX/Cursor" {
	Properties {
		_MainTex ("Base", 2D) = "white" {}
	}

	CGINCLUDE

		#include "UnityCG.cginc"

		sampler2D _MainTex;

		half4 _MainTex_ST;

		struct v2f {
			half4 pos : SV_POSITION;
			half2 uv : TEXCOORD0;
		};

		v2f vert(appdata_full v) {
			v2f o;

			o.pos = UnityObjectToClipPos (v.vertex);
			o.uv.xy = TRANSFORM_TEX(v.texcoord, _MainTex);

			return o;
		}

		fixed4 frag( v2f i ) : COLOR {
			return tex2D (_MainTex, i.uv.xy);
		}

	ENDCG

	SubShader {
		Tags { "RenderType" = "Transparent" "Queue" = "Transparent+100"}
		Cull Off
		Lighting Off
		ZWrite Off
		ZTest Always
		Fog { Mode Off }
		Blend SrcAlpha OneMinusSrcAlpha

	Pass {

		CGPROGRAM

		#pragma vertex vert
		#pragma fragment frag
		#pragma fragmentoption ARB_precision_hint_fastest

		ENDCG

		}

	}
	FallBack Off
}![]()
Bước 3: Thiết lập Bộ điều khiển ký tự từ trên xuống
Hãy thiết lập Bộ điều khiển ký tự từ trên xuống:
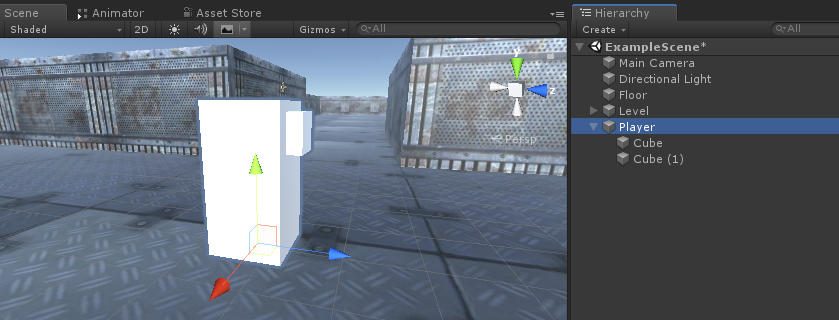
- Tạo một GameObject mới và gọi nó "Player"
- Tạo một Khối lập phương mới và chia tỷ lệ cho nó (Trong trường hợp của tôi, tỷ lệ là (1, 2, 1))
- Tạo Khối lập phương thứ hai, thu nhỏ nó lại và di chuyển nó lên khu vực phía trên (Điều này chỉ đơn giản là để biết người chơi đang nhìn theo hướng nào)
- Di chuyển cả hai Khối bên trong Đối tượng "Player" và loại bỏ các thành phần BoxCollider của chúng
Bây giờ, trước khi đi xa hơn, hãy tạo prefab mục tiêu Aim:
- Tạo một GameObject mới và gọi nó "AimTarget"
- Tạo một Quad mới (GameObject -> Đối tượng 3D -> Quad) và di chuyển nó vào trong Đối tượng "AimTarget"
- Gán Họa tiết bên dưới cho Quad và thay đổi Material Shader thành 'Custom/FX/Cursor'
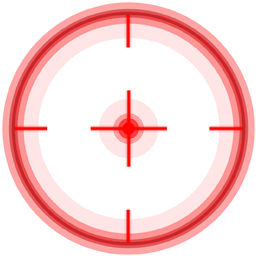
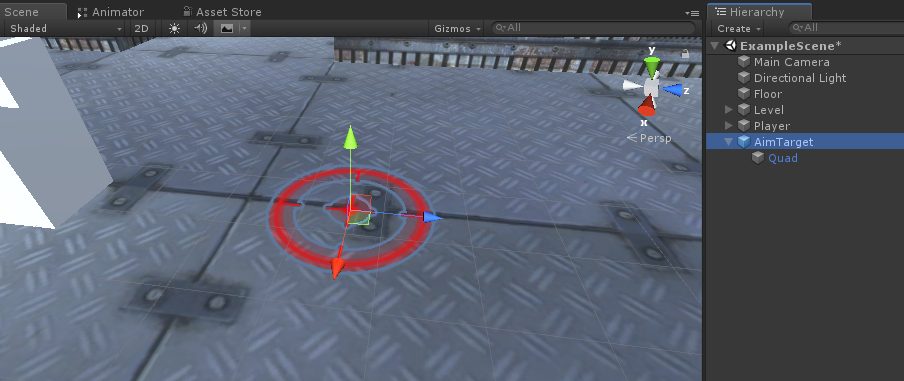
- Lưu "AimTarget" vào Prefab và xóa nó khỏi Scene
![]()
Quay lại phiên bản Player:
- Đính kèm tập lệnh SC_TopDownController vào Đối tượng "Player" (Bạn sẽ nhận thấy rằng nó đã thêm một số thành phần bổ sung như Rigidbody và CapsuleCollider)
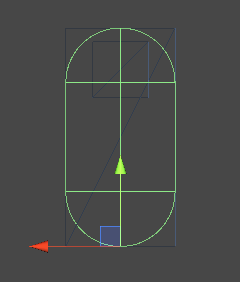
- Chia tỷ lệ CapsuleCollider cho đến khi nó khớp với kiểu máy nghe nhạc (trong trường hợp của tôi, Chiều cao được đặt thành 2 và Trung tâm được đặt thành (0, 1, 0)
- Và cuối cùng, gán các biến "Player Camera" và "Target Indicator Prefab" trong SC_TopDownController

Phiên bản Player hiện đã sẵn sàng, hãy kiểm tra nó:
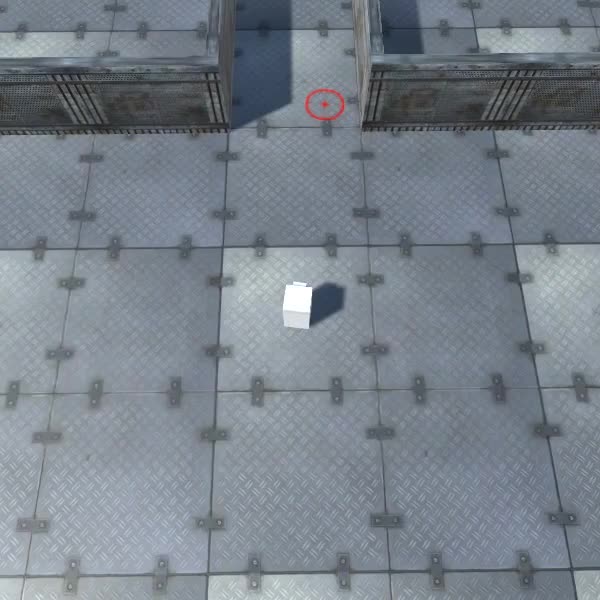
Mọi thứ hoạt động như mong đợi.